
Karaage Chicken & Waffle Fries from Ms Clucks Deluxe
Karaage Chicken & Waffle Fries from Ms Clucks Deluxe

A delicious summer dinnertime staple that also became a topic of debate when some members of the family called it ‘pasta salad’. It’s okay, we had a long discussion about genre and qualia, and now they only call it that specifically to annoy me.
Serves 4-6
For the noodles and sauce
1 lb. noodles, usually lo mein or spaghetti, but you can use any other type if you like. While you’re doing everything else, you can cook them according to their package directions, drain, and cool them by rinsing them with cold water.
1/4 cup canola oil, or other neutral oil (you can use refined peanut or sesame oil for this part)
1/4 cup sesame seeds
2 cloves garlic, minced
1 1-inch finger of fresh ginger, minced
1/4 cup each of creamy peanut butter and tahini or sesame paste, or 1/2 cup total of either, depending on how you’re feeling, and what you have on hand
1/4 cup soy sauce
2 TB rice vinegar or black vinegar if you have it
2 TB Asian-style toasted sesame oil
1 TB honey
2 tsp (or more) sriracha, sambal oelek, or other chili sauce
Toppings, &c.
This is just what I put in this time, but I do it differently depending on what I have around/feel like. You could add cabbage, chicken, chilies, even other things that don’t start with the letter ‘c’. Just be aware that if you have a lot of toppings you might need to make extra sauce.
2 carrots, julienned
1/2 a large cucumber, halved lengthwise then sliced thin
1/2 lb. snap pea pods, halved
4 hard-boiled eggs, sliced
5 or so scallions, thinly sliced
large handful of cilantro, chopped
roasted peanuts and sesame seeds
1. Heat the oil and sesame seeds over medium heat in a saucepan. When the sesame seeds start to turn golden brown, add the garlic and ginger, stir, and remove from heat. Continue stirring occasionally until it stops sizzling.
2. Add the rest of the sauce ingredients, stir, and let cool a bit before mixing with the noodles. Adjust the seasonings until it tastes good to you.
3. Toss in all your toppings, reserving some for a garnish if you like. Serve room temp, or chilled, whichever you prefer.

Teriyaki Burgers via Serious Eats, with homemade teriyaki sauce, and shichimi togarishi, because I didn’t have any, but weirdly had all the ingredients for it (also pickles).


Chocolate Chip Scones, via King Arthur Flour
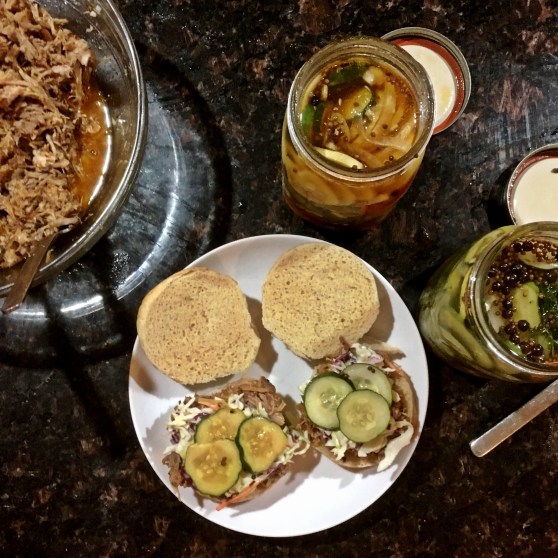
I wanted to take my pickles for a test drive, so I made pulled pork sandwiches, and, I will say, both styles of pickle worked out just fine. The pulled pork is from this recipe for Carolina Style Pork BBQ Sandwiches from Epicurious, and look, the thing your slow cooker is best suited for is braising meat for a long time at a low temperature, which is kind of the same general idea as barbecue, but since it doesn’t involve any smoke, and does involve a lot of liquid, it’s not remotely the same thing. So this is really pretty good pulled pork, but it ain’t barbecue.
The cole slaw is shredded cabbage and carrots, with mayonnaise, yogurt, apple cider vinegar, and maple syrup. That’s kind of my usual go-to for cole slaw, but you can add other shredded vegetables, like onions, or apples (not a vegetable, I realize), or some fresh herbs or scallions if you like. I just throw everything in a bowl and then taste it and adjust it, you know, add more vinegar if it needs to be tangier, add more syrup if it needs to be sweeter. You can use sour cream or buttermilk or whatever sour-ish dairy you have in the fridge, I just like to cut the mayo with something. Oh, and don’t forget the salt, and some sriracha or other hot sauce, if you like it spicy.
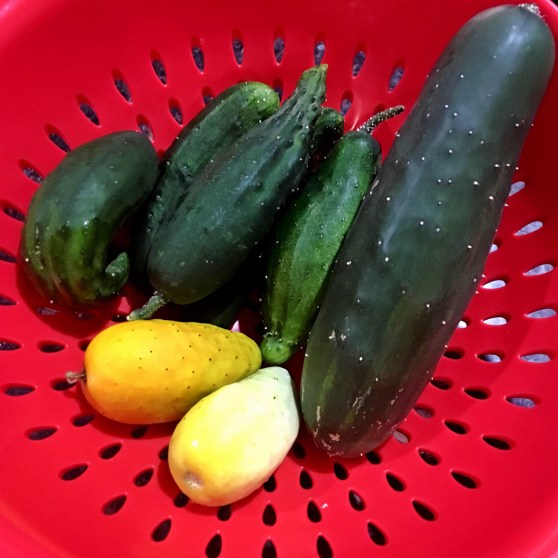
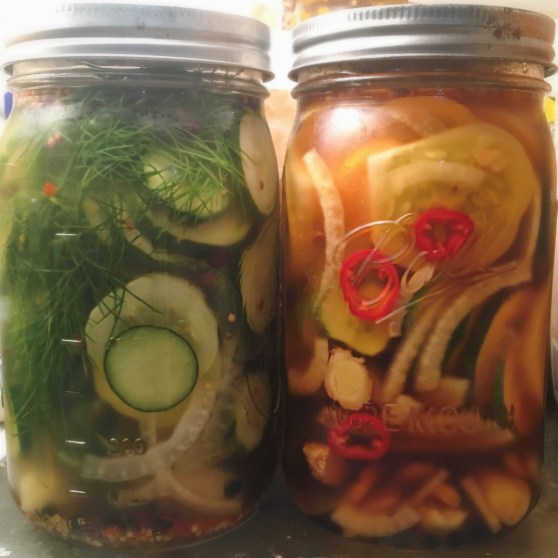
We actually harvested enough cucumbers from our tiny container garden to make two batches of pickles! I made one batch that was your basic garlic dill, and one batch inspired by Asian-style cucumber salads. The method was the same for both, so I’m going to go through that first, then give you the ingredients. If you’re not growing your own cukes, it’s worth it to get some from your local farmers market while they’re in season.
1. Heat up the vinegar, water, salt, and sugar, stirring until the salt and sugar dissolve. Then take it off the heat and let it cool while you do everything else. For the Asian-inspired pickles, you can stir in the other liquid ingredients at this point.
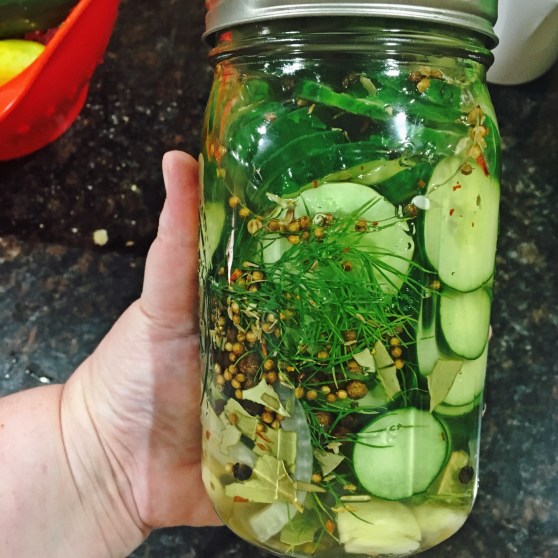
2. Place basically everything else but the cucumbers in whatever container you’re using. I used quart-sized jars, but since we’re not canning them you can use whatever non-reactive container you like, as long as you can situate it so the brine is covering all the cucumbers.
3. Slice up the cucumbers however you like. Or you can leave then whole, but I would maybe poke some holes in them if they’re very big to make sure the brine penetrates all the way into them. Put the cucumbers in your container, then pour the brine over everything (the recipe makes more brine than you’ll probably need, but you can always throw some more vinegar and water on top if you need to). Maybe give it a thump or two on the counter to get out any air bubbles.
4. Cover and throw in the refrigerator for 24 hours. I like to give them a shake every once in a while, but I’m not sure that’s necessary. After 24 hours they’re ready to eat, and they should keep for a while in the fridge after that, although they’ll soften over time.
Garlic Dill Pickles
1 lb. pickling cucumbers
1 cup apple cider vinegar
1 cup water
1 1/2 TB pickling or kosher salt
1 1/2 tsp sugar
4 cloves garlic, peeled and smashed
1/4 cup sliced onion
couple sprigs of dill
1 tsp each dill seed, black peppercorns, mustard seed, coriander seed, allspice berries, and crushed red pepper flakes
3 bay leaves, crumbled

Asian-Inspired Pickles
1 lb. pickling cucumbers
3/4 cup rice vinegar
3/4 cup water
1 1/2 TB salt
1 1/2 TB sugar
2 TB soy sauce
2 TB mirin
1 tsp sesame oil
2 cloves garlic, crushed
1/4 cup sliced onion
1 1-inch finger of fresh ginger, sliced
1 small red chili (I used Fresno), sliced
2 whole star anise
4 whole cloves
1 tsp each peppercorns and coriander seed

I’ve lived in New England my whole life, but my grandparents retired to Chapel Hill, North Carolina when I was very young, and an aunt and an uncle moved down south with their families soon after, so while I’m not from the South, that side of the family is pretty firmly transplanted there, and we’ve adopted some of their food traditions. Biscuits and gravy is definitely my favorite, and, in my opinion, not enough Northerners have been won over to its deliciousness. What I’m giving you here is more of a method than a recipe per se, but I hope you give it a try, and add it to your weekend breakfast repertoire.
1. Make your favorite biscuits. You can try these Sourdough Discard Biscuits, but any good, plain, savory biscuit will do. This post is more about the gravy part, anyway.
2. Brown 1 lb. bulk breakfast sausage over medium-high heat, breaking it up with a spoon as you go. If nobody has bulk sausage, you can peel the skins off some raw links instead.
3. Turn the heat down to medium, and add a few spoonfuls of flour, enough to trap all the fat the sausage has released. So, add the flour, stir, and if there’s still some grease in the pan, add more flour until it’s dry.
4. Now, you’re basically just making a bechamel sauce at this point, although, since it’s a more ad hoc version it’s called sawmill gravy instead. Okay, so if you’re a super organized person, what you might do is, while the sausage is browning, heat up a pot of milk just to a simmer. It is generally a little easier to incorporate hot liquids into the gravy, but it’s the morning, I don’t want to have to think ahead, so I just add a little cold milk to the pan and wait until it heats up before I start stirring it. In my experience that works just as well as the other way, so I say go for it. Anyway, add a little milk, wait for it to heat up, stir until you have an even paste, with all the flour incorporated and no weird lumps — there’s sausage, and that’s going to be lumpy, but no flour lumps — and then just keep repeating until the gravy is the thickness you like.
5. Taste it and season it. This step really depends on the sausage and what it’s got going on, but I generally find myself adding sage, thyme, salt, pepper, maybe some cayenne or hot sauce, maybe some nutmeg. If it tastes floury at this point, just cook it a little longer. If it gets too thick, you can add more milk. You can also change it up by using broth, cream, buttermilk, some water if you have to. Make a New England-y version by adding cider and maple syrup, I don’t know.
6. Split the biscuits in half, put some gravy on top, done.

Another recipe from Polska! The first time I made this recipe I made half, because it sounded like a lot of cabbage, and I totally regretted it. This is so good you guys!
Serves 6
7 oz. bacon, cut into thin strips
2 large onions, finely chopped
2 leafy young cabbages or Napa cabbages, shredded
2 TB water
juice of 1 lemon
2 bunches of dill, finely chopped
3-4 TB tomato paste
1 tsp caster sugar
salt and pepper to taste
1. Fry the bacon over medium heat until crispy (make sure you use a big enough pan for all the cabbage!). Add the onions and continue to cook for 4-5 minutes.
2. Add the shredded cabbage and water, and mix together. Season and cover with a lid, reduce heat to low, and cook for 10 minutes.
3. Stir in the lemon juice, 3/4 of the chopped dill, tomato paste, and sugar. Continue to cook, uncovered, stirring every couple of minutes, for another ten minutes (or more, depending on your cabbage). Taste and season again as needed.
4. Just before serving add the reserved dill.
The original recipe cooks the bacon in 4 TB canola oil, but I don’t think that’s really necessary.
Due to a combination of bad luck and stubbornness I ended up making pierogi in an un-air-conditioned kitchen in the middle of July. Fortunately, the whole family pitched in to help, and that’s basically my best advice for making dumplings (or dumpling-adjacent foods like ravioli or tamales): get a bunch of people to help. It turns what might be a difficult and daunting task into a party!
The recipe I used is from Polska: New Polish Cooking by Zuza Zak
Makes about 24 pierogi*
For the dough:
2 1/2 cups all-purpose flour
2 egg yolks
2 TB unsalted butter
large pinch of salt
approx. 1/2 cup warm water
For the filling:
2 onions
1 TB salted butter
5 oz. twaróg**
1 potato, peeled, cooked, and diced
salt and pepper
1. Make the dough by combining all the ingredients, using only enough water to bring the mixture together. Knead until smooth, cover, and let rest for 20 minutes.
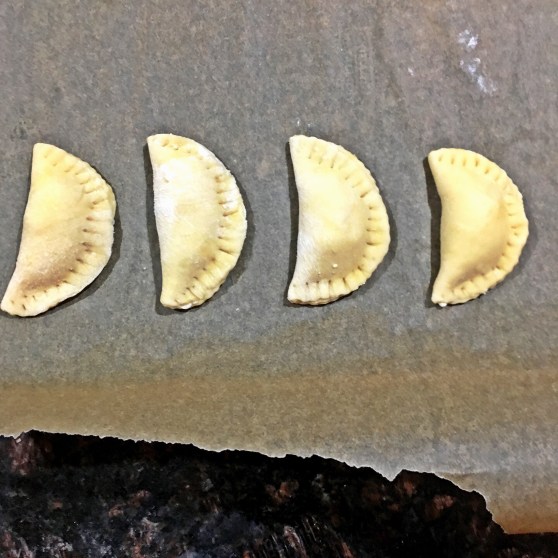
2. Chop the onions finely, and fry them in butter. Combine half of the onions, cheese, and potato for the filling. Season with salt and pepper.
3. Roll the dough as thinly as possible on a lightly floured surface. There are a few ways to make pierogi, but what we did was to cut out rounds, fill them, fold them in half, and crimp with a fork. If you need to, you can use some water to seal the edges.
4. Bring a large pot of salted water to a boil. Gently lower the pierogi into the water, cooking in two batches. As soon as they start to float up to the top, cook them for 2-3 minutes more. Remove them with a slotted spoon to the pan with the onions.
5. Fry the pierogi for a minute or two, then serve.

*The recipe actually says ‘serves 2’, but unless those are two very hungry people, I think you can get away with more.
**The recipe recommends ricotta as a substitute, but any fresh or farmer’s cheese should be good. I used quark, which is kind of the same idea as twaróg as far as I can tell.
In addition to the Milk Bar(ish) cake, for my son’s birthday dinner we made pierogies, and one of my favorite cabbage recipes (and those recipes are forthcoming, I promise). We had also planned to make pyzy, which are a kind of dumpling with a potato dough and usually a meat filling. Unfortunately for us, they completely disintegrated in the hot water. Fortunately for us, the strained mashed potatoes with meat, mixed with the shallots fried in butter that were going to be the sauce for the pyzy, were honestly really good. So much so that, while I do intend to try making pyzy again with a different recipe, I’m also considering trying to make the failed pyzy again on purpose.

Alas, poor pyzy
My brother is a chef, and one time he had to fill in for the pastry chef while she went on leave. Macarons were on the menu, and he asked her for advice on how to make the finicky cookies all come out looking good. Her secret? “Buy a lot of extra almond flour.” Cooking can be unpredictable, and sometimes things just don’t turn out, even if you’ve got a lot of experience. If you’re lucky, you might create something new, or at least salvage dinner. If you’re not, and the only thing you made was a mess, then hopefully you learned a little, or have a funny story to tell on your blog. Look, if the popularity of BA’s Gourmet Makes teaches us anything, it’s that people love a good kitchen disaster, so I hope you enjoy mine.
