Stuffing Formula

I realize it’s a bit belated, but it will still be here the next time you want to make stuffing. Honestly, everything about this is probably very fungible, but this year in particular I didn’t want to have to run out to the store last minute for something I forgot, so I was even more planny than usual.

Cornbread and Sausage Stuffing

Per 1 lb. of bread* (whatever kind you prefer, or a mix, cubed and toasted until dry):

1 onion, chopped
2 celery ribs, chopped
6-8 TB butter (less if you’re using sausage, more if you’re going veggie)
2 TB mixed chopped fresh herbs – think Greensleeves here – plus some chopped celery leaves
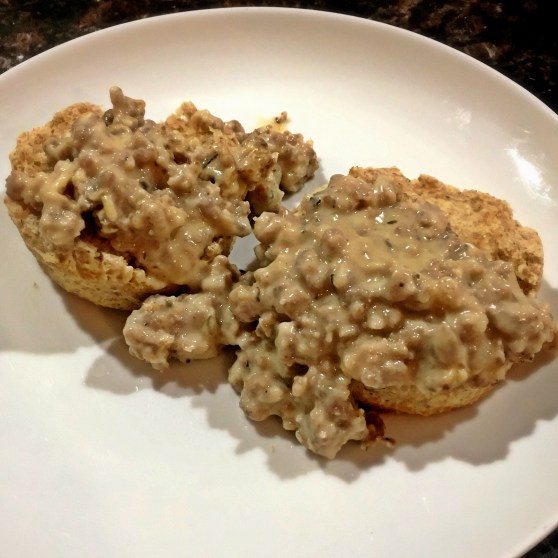
1/2 lb. sausage meat (optional, or you can use bacon, or ham)
1 1/2 c broth or stock, turkey, chicken, or veggie
1 egg

1. Sauté onion and celery, in the butter until softened. Remove from heat, and add fresh herbs and celery leaves.

2. Optional: brown the meat.

3. In a large bowl, mix the bread, the onion mixture, the meat (if using), and add broth or stock, and beaten egg. Season to taste with salt and pepper, and any other dried herbs or spices you like in stuffing (sage, thyme, marjoram, paprika, nutmeg, etc.)

4. Dump into a greased pan, cover with foil, and bake at 350°. Can be cooled and refrigerated for a day or two, then reheated, or baked on the day. At the end of the cooking time, remove the foil and cook for 15 minutes or so at 425° to crisp up the top.

Add whatever other aromatics or mix-ins you like. Fresh or dried fruits, nuts, peppers, leeks, oysters, I don’t know, you do you.

* for reference, 2 lbs. will get you a 9 x 13 pan of stuffing

Vegetarian Sourdough Stuffing with Apples and Dried Cranberries

Ramen Egg Salad

I started to make some ramen eggs on the assumption that we had saved the marinade from the last time we made ramen, but that assumption proved incorrect, so I turned them into egg salad sandwiches for lunch. And they were delicious! Unfortunately I did not have the forethought to take a picture before they were all devoured, but I’m recording the basic method here so you can try it at home. Maybe take a picture and send it to me?

Part 1: make soft/medium boiled eggs. Boil enough water to cover however many eggs you’re making (I made six, which was enough for three sandwiches). Once the water’s boiling, place the eggs in the pot. Boil gently for seven minutes (that will give you a pretty jammy yolk, you can go down to six for a runny yolk, or up to nine for a more solid yolk), then remove the eggs from the pot and place them directly in an ice/cold water bath. Once they’ve chilled for a bit, crack the shells and put back in the water (getting some water under the shell makes them easier to peel cleanly). Peel and use, or refrigerate until using.

Part 2: make sriracha aioli. I used leftovers from last night’s kimchi hotdogs, but if you aren’t so lucky, you can make the actual version (from Double Awesome Chinese Food by Andrew, Irene, and Margaret Li: whisk an egg yolk, 2 cloves of garlic minced, 1 TB sriracha, 1 TB rice vinegar, 1/4 tsp each salt and sugar, together. While whisking, slowly drizzle in 3/4 cup canola or other neutral oil. Add another half TB of sriracha and vinegar, then taste and adjust seasonings however you like) now, or you can just combine sriracha and mayonnaise in whatever ratio you like.

Part 3: make the salad: Cut your eggs up into big chunks and throw into a bowl with a splash each of toasted sesame oil and rice vinegar, some salt and pepper, and and two-ish thinly sliced scallions. Mix, crushing the eggs a bit, taste and season as needed. Since the yolks are somewhere on the jammy spectrum, the salad will be pretty gooey. If that’s not your bag, make it with hard boiled eggs instead.

Part 4: assemble your other ingredients. Toast two slices of bread per sandwich (so, six, in my case, and I think most types of bread would be pretty good for this sandwich), peel, pit, and slice a ripe avocado, get some lettuce or other greens of your choice clean and ready, and if you have some, a pinch of shichimi togarashi is pretty nice to have.

Part 5: sandwiches! For each sandwich, spread both slices of bread with a layer of sriracha aioli. Arrange slices of avocado on one slice of bread, and sprinkle with a little sea salt if you’re feeling fancy. Mound some of the egg salad on top of the avocado, and add that pinch of shichimi togarashi. Top with the lettuce and the other slice of bread. Have a great lunch!

Creamed Spinach and Swiss Chard

I made this the other day, and then baked some eggs in it. There are a few different methods for making creamed spinach, so I thought I’d just quickly share mine. You can use any of the softer greens, but it’s probably better if they’re not too bitter.

1. Start out by prepping your greens: wash and dry them, remove any stems and decide if you want to use them (I thinly slice the Swiss chard stems, for example), chop to your preferred fineness. Use more greens than you think you’ll need; I did five oz. of baby spinach, plus a bunch of chard, and it was only barely enough.

2. Sauté some sliced or chopped onion or leeks in a decent amount of butter, or you can start with some diced bacon, ham, or pancetta. If you’re using any stems, you can add them now. If you want spicier greens, toss in some finely chopped fresh chilies, or some dried ones. Cook your base until it’s browned a little or a lot, depending on your preference.

3. Throw in the greens, maybe in a couple of batches if your pan isn’t initially big enough. Season with salt, but less than you think, because they’re going to cook down. Cook them until they’re just wilty. If they’re really liquidy, you can boil some of it off if it bothers you. Add a couple of tablespoons of heavy cream, taste, and season with more salt if needed, pepper, and a little nutmeg. I like only a little cream, but you can always add more if you want.

4. Finish with some chopped fresh tomato, or some lemon or lime juice if it needs balancing.

Grilled Pizza

We make homemade pizza fairly often in the winter, but who wants to turn their oven up to 500° when it’s in the 90s? Enter grilled pizza, which, you still have to stand around a hot grill for, but at least your whole house doesn’t get overheated.

I used Bon Appétit’s method for the pizza, but I really don’t like supermarket pizza dough, so I made my own

This is my second-favorite pizza dough recipe, because my favorite pizza dough recipe takes six hours, so you have to know before noon that you want pizza for dinner. This one, adapted from Lynne Rossetto Kasper’s The Italian Country Table, only rises for two hours, so you can be a little more spontaneous. I quadrupled the recipe, for six personal-size pizzas.

1 to 1 1/4 cups all-purpose flour
1/3 tsp instant yeast
1/2 tsp salt
1/2 cup warm water

1. Mix the dry ingredients, then add the water and mix until combined. Knead for about five minutes, until the dough comes together, and is soft, but not too sticky, adding more flour as needed.

2. Form into a ball (or as many balls as you’d like pizzas, if you’re increasing the recipe), and place on well-floured surface. Flour the top of the dough, cover, and let rise for two hours, or about tripled in bulk. Then make some pizzas!

Bonus no-cook pizza sauce recipe: Combine a 28 oz. can of crushed tomatoes (these can be pre-crushed, or you can drain some whole tomatoes and run them through a food mill. You might have to experiment with different brands to get a flavor and consistency that you like) with olive oil, salt, pepper, and a clove or two of minced garlic. Taste and add lemon juice or sugar if the flavor needs adjusting, then let it sit while you’re busy with your other pizza business.

Pulled Pork Sandwiches

I wanted to take my pickles for a test drive, so I made pulled pork sandwiches, and, I will say, both styles of pickle worked out just fine. The pulled pork is from this recipe for Carolina Style Pork BBQ Sandwiches from Epicurious, and look, the thing your slow cooker is best suited for is braising meat for a long time at a low temperature, which is kind of the same general idea as barbecue, but since it doesn’t involve any smoke, and does involve a lot of liquid, it’s not remotely the same thing. So this is really pretty good pulled pork, but it ain’t barbecue.

The cole slaw is shredded cabbage and carrots, with mayonnaise, yogurt, apple cider vinegar, and maple syrup. That’s kind of my usual go-to for cole slaw, but you can add other shredded vegetables, like onions, or apples (not a vegetable, I realize), or some fresh herbs or scallions if you like. I just throw everything in a bowl and then taste it and adjust it, you know, add more vinegar if it needs to be tangier, add more syrup if it needs to be sweeter. You can use sour cream or buttermilk or whatever sour-ish dairy you have in the fridge, I just like to cut the mayo with something. Oh, and don’t forget the salt, and some sriracha or other hot sauce, if you like it spicy.

Biscuits and Gravy

I’ve lived in New England my whole life, but my grandparents retired to Chapel Hill, North Carolina when I was very young, and an aunt and an uncle moved down south with their families soon after, so while I’m not from the South, that side of the family is pretty firmly transplanted there, and we’ve adopted some of their food traditions. Biscuits and gravy is definitely my favorite, and, in my opinion, not enough Northerners have been won over to its deliciousness. What I’m giving you here is more of a method than a recipe per se, but I hope you give it a try, and add it to your weekend breakfast repertoire.

1. Make your favorite biscuits. You can try these Sourdough Discard Biscuits, but any good, plain, savory biscuit will do. This post is more about the gravy part, anyway.

2. Brown 1 lb. bulk breakfast sausage over medium-high heat, breaking it up with a spoon as you go. If nobody has bulk sausage, you can peel the skins off some raw links instead.

3. Turn the heat down to medium, and add a few spoonfuls of flour, enough to trap all the fat the sausage has released. So, add the flour, stir, and if there’s still some grease in the pan, add more flour until it’s dry.

4. Now, you’re basically just making a bechamel sauce at this point, although, since it’s a more ad hoc version it’s called sawmill gravy instead. Okay, so if you’re a super organized person, what you might do is, while the sausage is browning, heat up a pot of milk just to a simmer. It is generally a little easier to incorporate hot liquids into the gravy, but it’s the morning, I don’t want to have to think ahead, so I just add a little cold milk to the pan and wait until it heats up before I start stirring it. In my experience that works just as well as the other way, so I say go for it. Anyway, add a little milk, wait for it to heat up, stir until you have an even paste, with all the flour incorporated and no weird lumps — there’s sausage, and that’s going to be lumpy, but no flour lumps — and then just keep repeating until the gravy is the thickness you like.

5. Taste it and season it. This step really depends on the sausage and what it’s got going on, but I generally find myself adding sage, thyme, salt, pepper, maybe some cayenne or hot sauce, maybe some nutmeg. If it tastes floury at this point, just cook it a little longer. If it gets too thick, you can add more milk. You can also change it up by using broth, cream, buttermilk, some water if you have to. Make a New England-y version by adding cider and maple syrup, I don’t know.

6. Split the biscuits in half, put some gravy on top, done.

How to make a Milk Bar(ish) cake

This is not a recipe post, because a.) Milk Bar cake recipes are pretty involved, and b.) I’m not making a recipe from the book anyway (the cake is for my son’s 19th birthday, and he picked out what he wanted, which was kind of a s’mores-inspired, but with lots of chocolate, kind of situation). Instead I’m just going to describe the style of the cake, and the process of making it. If you’re feeling inspired, you can freestyle your own, but Christina Tosi is a mad dessert genius, and I highly recommend picking up one of her cookbooks, or patronizing a Milk Bar near you.

Part 1: The Cake

Bake your cake in a sheet pan, then cut out rounds to use for your cake layers. The cookbook makes a quarter sheet cake, but, since I only have half sheet pans, and since everyone likes extra cake, I usually double the recipe. Use a 6-inch cake round to cut out 3 layers, and save the extra for snacking on. Or, you could make a taller cake, a wider one, or just make the original amount of cake and stop listening to me because I always make too much food. I’m making a pretty simple chocolate cake for this, but you could use any kind of cake, as long as it’s sturdy enough to cut out.

Using the cake round and an acetate strip, set up the cake form apparatus on a flat, portable surface, and put your first layer in there. If you’re using the quarter sheet pan, then the bottom layer is going to be a mishmash of cake scraps.

Part 2: The Soak

This is for moistening your cake layers. Milk Bar is obviously famous for their cereal milk, but I was worried that this cake was going to be very sweet, so I’m just using plain milk. You can use this step to add some extra flavor with any kind of syrup, juice, or milk.

Part 3: The Frosting

The whole deal about a Milk Bar cake is that it’s not frosted on the outside, keeping all the layers visible, but that doesn’t mean you can’t have frosting as one of your layers. Since this is kind of a s’mores-y cake, I’m using graham frosting.

Part 4: Other Fillings

Here’s where you get to go nuts, maybe literally. There are so many options for adding some crunch, or something gooey, maybe some fruit, I don’t know. Use your imagination! We’re going with chocolate crumb, and toasted mini-marshmallows.

Part 5: Repeat

Try to make your layers even, but messiness is kind of the whole charm of this type of cake, so please don’t try to be perfect! However, since the layers are going to be visible, do try to push them all the way out to the edge. After you’ve done the first layer of frosting/fillings, add another strip of acetate between the cake ring and the first acetate strip, then repeat all the previous steps (cake, soak, frosting, fillings), and top with the last round of cake.

Part 6: The Top

Here’s where you might put any decorations you might want. I’m simply using chocolate fudge sauce.

Part 7: Freezing, Thawing, and Finishing

So the cake needs to go into the freezer overnight to set. Then, when it’s done, you pop it out of the mold and let it thaw out before serving it. Maybe throw it on a fancy platter or something.

Or don’t. It’s a pretty good time even served on a plain white plate.