How to make a Milk Bar(ish) cake

This is not a recipe post, because a.) Milk Bar cake recipes are pretty involved, and b.) I’m not making a recipe from the book anyway (the cake is for my son’s 19th birthday, and he picked out what he wanted, which was kind of a s’mores-inspired, but with lots of chocolate, kind of situation). Instead I’m just going to describe the style of the cake, and the process of making it. If you’re feeling inspired, you can freestyle your own, but Christina Tosi is a mad dessert genius, and I highly recommend picking up one of her cookbooks, or patronizing a Milk Bar near you.

Part 1: The Cake

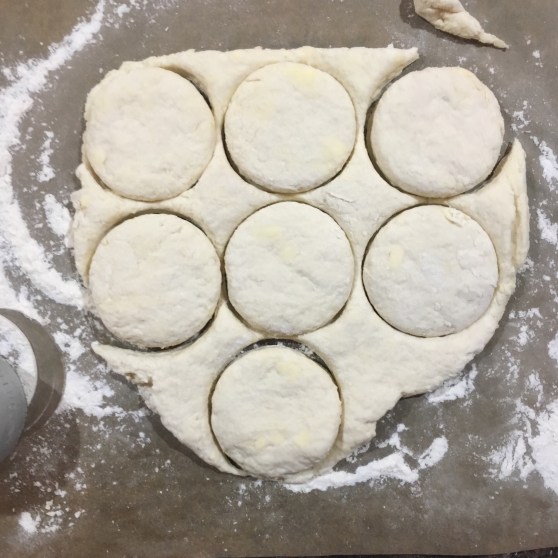
Bake your cake in a sheet pan, then cut out rounds to use for your cake layers. The cookbook makes a quarter sheet cake, but, since I only have half sheet pans, and since everyone likes extra cake, I usually double the recipe. Use a 6-inch cake round to cut out 3 layers, and save the extra for snacking on. Or, you could make a taller cake, a wider one, or just make the original amount of cake and stop listening to me because I always make too much food. I’m making a pretty simple chocolate cake for this, but you could use any kind of cake, as long as it’s sturdy enough to cut out.

Using the cake round and an acetate strip, set up the cake form apparatus on a flat, portable surface, and put your first layer in there. If you’re using the quarter sheet pan, then the bottom layer is going to be a mishmash of cake scraps.

Part 2: The Soak

This is for moistening your cake layers. Milk Bar is obviously famous for their cereal milk, but I was worried that this cake was going to be very sweet, so I’m just using plain milk. You can use this step to add some extra flavor with any kind of syrup, juice, or milk.

Part 3: The Frosting

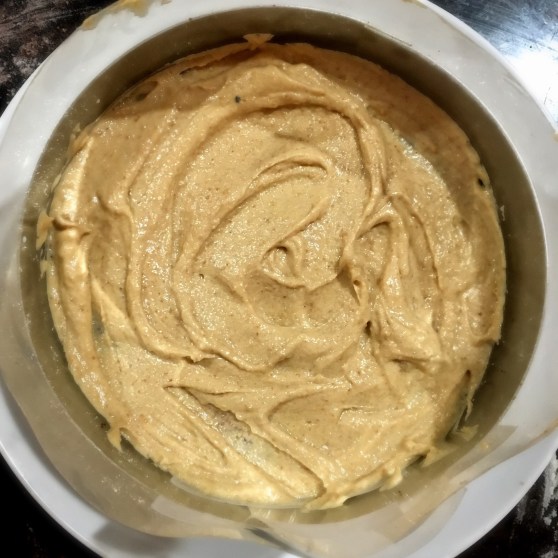
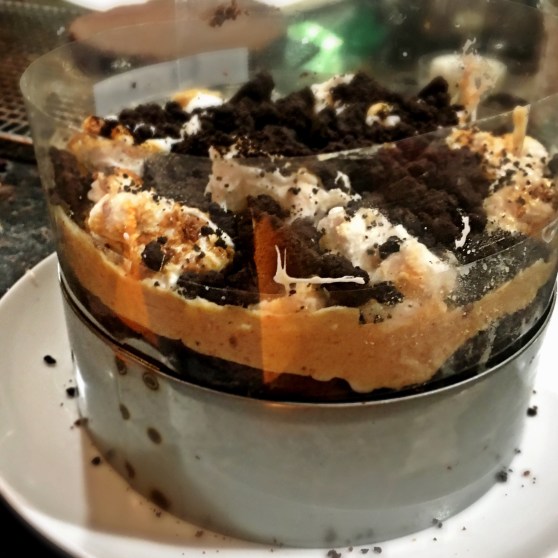
The whole deal about a Milk Bar cake is that it’s not frosted on the outside, keeping all the layers visible, but that doesn’t mean you can’t have frosting as one of your layers. Since this is kind of a s’mores-y cake, I’m using graham frosting.

Part 4: Other Fillings

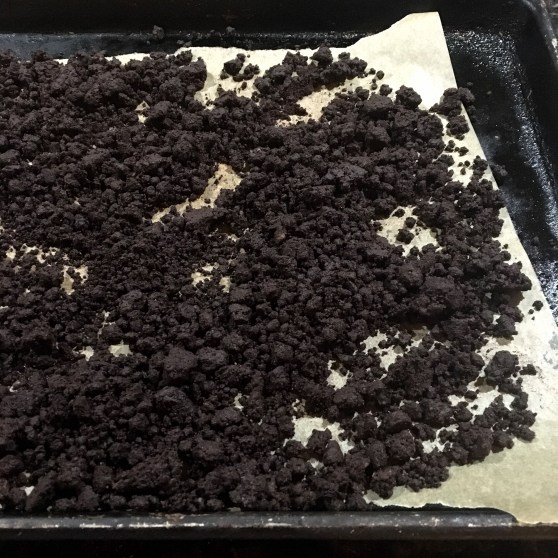
Here’s where you get to go nuts, maybe literally. There are so many options for adding some crunch, or something gooey, maybe some fruit, I don’t know. Use your imagination! We’re going with chocolate crumb, and toasted mini-marshmallows.

Part 5: Repeat

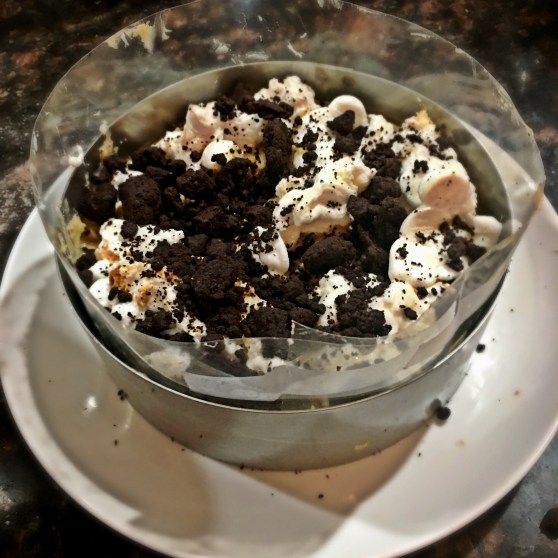
Try to make your layers even, but messiness is kind of the whole charm of this type of cake, so please don’t try to be perfect! However, since the layers are going to be visible, do try to push them all the way out to the edge. After you’ve done the first layer of frosting/fillings, add another strip of acetate between the cake ring and the first acetate strip, then repeat all the previous steps (cake, soak, frosting, fillings), and top with the last round of cake.

Part 6: The Top

Here’s where you might put any decorations you might want. I’m simply using chocolate fudge sauce.

Part 7: Freezing, Thawing, and Finishing

So the cake needs to go into the freezer overnight to set. Then, when it’s done, you pop it out of the mold and let it thaw out before serving it. Maybe throw it on a fancy platter or something.

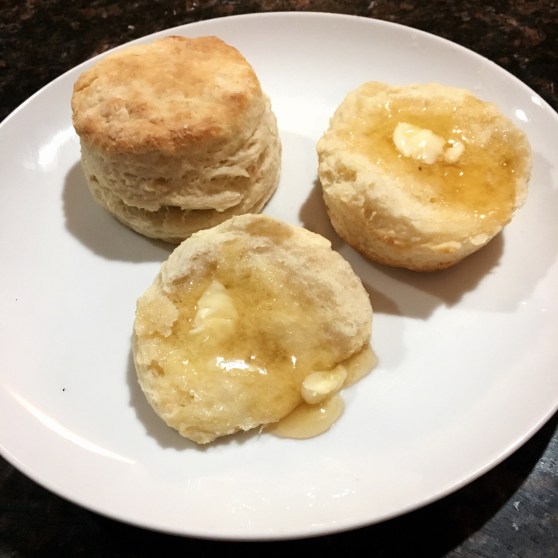
Or don’t. It’s a pretty good time even served on a plain white plate.

Chicken Thigh Sandwich Number 1: Thai-Inspired

It all started when my husband brought home chicken thighs for dinner, and nothing else. He was planning on marinating and grilling them, but he only bought five thighs for our family of four (including two teenagers), and had no plans for sides, except ‘I think we have stuff for salad?’. We did have some leftover hamburger buns, so I suggested making sandwiches, and, honestly? It was a great idea, and we both ended up wondering why we hadn’t been making them all along. So, I don’t know if you’ve all been holding out on me, and secretly making chicken thigh sandwiches this whole time, or what, but I know like a thousand different ways to marinate chicken, and probably a million different toppings, so chicken thigh sandwiches done all different ways are the current weeknight dinner craze over here.

For the chicken:
The marinade I used was from Barbecued Chicken, Bangkok Style, found in True Thai by Victor Sodsook. The original recipe makes enough marinade for two 3-lb. chickens, so you can halve it, depending on how much chicken you’re making.

1 can (14 oz.) unsweetened coconut milk
2 TB yellow curry paste, or 1 TB curry powder
2 TB fish sauce
6 cloves garlic, chopped
1/3 cup loosely packed cilantro, including stems, chopped
2 1/2 TB light brown sugar, or palm sugar
1/2 TB ground white pepper

1. Throw everything in a blender or food processor, and blend until smooth. Coat your boneless, skinless chicken thighs in the marinade (I mean, just get as many thighs as you want to eat, which is probably more than five), cover, and refrigerate for at least 3 hours, or up to 24.

2. Prepare a grill with low coals/heat. Remove the chicken from the marinade, and cook slowly on one side with the cover off for a few minutes, and then covered for another few. Flip, and do the same thing, for a total of about 20 minutes, or until they’re done/the internal temperature reaches 165° F.

For the sauce:
AKA, your secret weapon, Sweet-and-Spicy Dipping Sauce, also from True Thai

Makes about 1 1/2 cups
1/2 cup white vinegar
1 cup sugar
1/2 tsp salt
1 TB Chinese-style chili-garlic sauce

In a small saucepan, bring vinegar and 1/2 cup sugar to a low boil over medium-high heat. Lower the heat to medium and stir in the rest of the sugar. Cook for 2 minutes, stirring frequently, until it comes back to a boil. Reduce the heat to low and add the salt. Simmer for 5 minutes, stirring occasionally. Stir in the chili-garlic sauce and remove from heat. Let cool and serve at room temperature. Go ahead and pour this stuff on anything, it’s the best.

For the peanut slaw:
I kind of just stirred together shredded cabbage and carrot, store-bought peanut sauce, lime juice, and salt, until I liked how it tasted. Then I added chopped up peanuts and cilantro. I didn’t have any scallions, but they’d probably be good, too.

For the cucumber relish/Ajaat:
There are lots of different recipes for Ajaat. This time I tried the one from Pok Pok by Andy Ricker, and it was good. It’s a little on the sweet side, though. Also, I couldn’t find any Thai chilies, or Serranos, which is what I usually substitute, so mine was made with Fresno chilies.

Makes about 2 1/4 cups
8 oz. medium, crisp, thin-skinned cucumbers, quartered lengthwise and sliced into triangles (about 1 1/2 cups)
3 oz. shallots, also quartered and sliced (abour 3/4 cup)
6 grams fresh red Thai chilies (about 4), thinly sliced
6 TB white vinegar
6 TB sugar
1/2 cup water
1/4 tsp kosher salt
Generous 1/4 cup cilantro leaves

Combine the cucumbers, shallots, and chilies. In a separate bowl, whisk together the vinegar, sugar, water, and salt, until the sugar and salt are dissolved. Pour enough to cover over the cucumbers, and stir well. You can eat it after just a few minutes, or cover and refrigerate for up to a day. Just before serving, sprinkle with the cilantro leaves.

For the sandwiches:
Use whatever kind of sandwich roll/bun you like (we had brioche). Split and top with a chicken thigh. Drizzle with the sauce, then top with slaw and relish. You could probably toast the buns if you like, but they were fine without.

I know it’s like four different things, but they’re all very easy, and some of them you can make ahead of time if you like. And they are so good, you guys! I promise you will be glad you got on the chicken thigh sandwich bandwagon before it was cool.

The Annual Strawberry Shortcake Post (with recipe and rant)

Strawberry shortcake

strawberry shortcake

Strawberry Shortcake is my number one, most favorite dessert (done properly, see below), and has been for as long as I can remember. I used to request it every year for my birthday, but strawberries aren’t exactly in season in April around here, so now I make it every June. My grandpa Jack used to have it for his birthday, too, which conveniently was in June. He passed away earlier this year, and I’m happy to have such a sweet way to remember him, now.

The recipe I use is from In the Sweet Kitchen by Regan Daley. Since I just did a biscuit recipe, I’m not going to go too deep into the shortcakes, but you can always refer to that post if you need tips.

Image of a cookbook

I don’t understand why they don’t give cookbooks better bindings

Makes 6
Scones:
2 cups all-purpose flour
1/4 cup sugar
1 TB baking powder
1/2 tsp salt
1/2 cup (1 stick) cold unsalted butter, cut into small pieces
1 large egg, lightly beaten
1/4 cup whole milk
5 TB heavy cream

Additional 1 TB each heavy cream and sugar, for topping the scones

Strawberries
2 quarts strawberries, hulled, then sliced, chopped, or mashed
3 to 4 TB sugar

Chantilly Cream
2 cups heavy cream
1 1/2 TB sugar
1 tsp vanilla extract

Note: I wrote the recipe as it appears in the book, but you can easily get away with half the strawberries and whipped cream if you’re only making six servings.

I usually make the strawberries first, so they can sit and get juicy, but you can make the scones first as the recipe suggests, if you want.

A colander full of large strawberries

the local strawberries we got at the supermarket were some big boys!

A large strawberry

an absolute unit

For the strawberries:
1. Mix the sliced, or otherwise mangled, strawberries with the sugar — taste the berries to determine how much you’ll need. Let them sit while you’re doing the other things. Maybe give them a stir from time to time.

For the scones:
1. Preheat the oven to 425° F. Line a baking sheet with parchment. Mix the dry ingredients together. Cut in the butter with a pastry cutter, or two knives, until there aren’t any chunks larger than a pea.

2. Mix the eggs, milk, and cream together. Add them to the dry ingredients + butter, and stir until just combined. Gather into a ball, and dump onto a floured surface. Pat into a circle (or square, or whatever, the shape doesn’t really matter), about 3/4″ to 1″ thick (you want it a little thicker than the biscuits, because it’s not going to rise as much), and cut with a large biscuit cutter.

3. Place the scones on the baking sheet. Brush the tops with the cream, and sprinkle with the sugar. Bake for 14 – 18 minutes, rotating halfway through, and checking to make sure the bottoms don’t get too dark (slide a second baking sheet under them if you’re worried about that happening). Remove to a rack and cool for 10 minutes or so, but you’ll want to serve them warm, so plan accordingly.

For the whipped cream:
1. Whip the cream and sugar. Add the vanilla and whip a bit more. You can do this while the scones are baking, or while they’re cooling.

Assembly:
1. Split the scones in half. My grandparents used to butter them, so I do, too. Top the bottom half with strawberries and cream. Put the top on top, then cover with more strawberries, and more cream. If you’re feeling fancy, you can reserve some good-looking strawberries to put whole on top.

Strawberry shortcake ingredients ready for assembly

And now, the rant:
‘Shortcake’ is short for ‘shortening cake’, i.e., a cake made with a solid fat (including vegetable shortening, but also butter and lard). Sponge cake, pound cake, and angel food cake all taste good with strawberries, but they do not a strawberry shortcake make. No, not even if you put whipped cream on top.

A true strawberry shortcake features a biscuit or scone, or even crumbled up pie crust, topped with macerated strawberries, and sweetened whipped cream. If you try to advertise something else for shortcake at your supermarket, I will laugh to myself as I go by at how deluded you are. If I order strawberry shortcake at your restaurant and I get something other than a shortcake, well, I’ll be very disappointed, and complain about it the whole ride home. (What? I don’t throw fits in grocery stores and restaurants, because I’m not a monster.)

Strawberry shortcake

the perfect dessert (we had them for brunch, though)

Seriously, strawberry shortcake, made when strawberries are in season, is basically the perfect dessert. Don’t mess with perfection, folks!

Sourdough Discard Biscuits

Sourdough discard biscuits

sourdough discard biscuits

The thing about a sourdough starter is that you have to throw away a bunch of dough every time you refresh it. Fortunately, there are a whole bunch of recipes that make use of the discarded portion; King Arthur Flour has helpfully compiled a bunch of theirs onto one page, including a recipe for biscuits. This recipe is not that recipe. I started there, but since my sourdough is smaller and drier, I altered it quite a bit.

Makes 10 or so

2 cups all-purpose flour
1 TB baking powder
1/4 tsp baking soda
1 tsp salt
1 stick (8 TB) unsalted butter, cold, cut into small pieces
sourdough starter remains: about one cup, or whatever you have going on
1 cup-ish buttermilk (depends on how wet your sourdough is)

1. Preheat the oven to 450° F. Line a baking sheet with parchment.

2. Mix the dry ingredients. Cut in the butter however you prefer (but see below). Add the starter, and enough buttermilk to make a slightly-sticky-until-you’ve-floured-it dough. Mix with a fork, then knead gently once or twice just to get it to cohere. Flour your fingers, or they will get coated in dough!

3. Dump the dough onto a floured surface and pat into a half-inch thich rectangle-ish shape. Fold it in half twice, then roll out into a 1/2″ – 3/4″ thick (look, to be honest, I don’t usually measure or care, just go for biscuit-sized) square. I try to go for big enough to make nine biscuits, but I almost always underestimate.

Biscuit dough, cut out

4. Using a biscuit cutter, or other round cookie cutter, cut out as many biscuits as fit (or don’t, and cut them into squares or triangles with a knife), then re-roll and cut out more until you’ve used up all the dough. The first ones are the best, so really try to fit as many in as you can.

Cut out biscuits

5. Put the biscuits on the cookie sheet — separate them if you like crispier sides, or put them close together if you like soft, pull-apart sides. Bake for 16 minutes, or until they’re lightly-browned top and bottom, rotating once halfway through. Remove to a rack to cool slightly, then enjoy,

Honestly I recognize that these are not the most practical to make, because most people don’t have sourdough starter going, but I’m including them because they are literally the best biscuits I’ve ever made, and I own a whole cookbook of just biscuit recipes, of which I’ve made most of them.

Southern Biscuits cookbook

that’s not hyperbole

Anyway, if you’ve made it this far, here are some general tips for biscuit making:

1. Handle everything gently. You should never be grabbing handfuls of dough and squeezing! Your biscuits will only be as tender as you are.

2. That includes any twisting or smearing! My preferred method of cutting in butter is to use a pastry cutter to start, and then break up any remaining clumps by hand, but! You have to only move the pastry cutter up and down, don’t wrench it around. And only use your fingertips to break things up. I forget where I read it, but you basically want to do the cash money hand gesture, where you rub your thumb and forefingers together, but in the dough. Also, when you cut the biscuits out, go straight up and down with the cutter, don’t twist it.

3. Don’t exactly panic about temperature. I mean, keep your butter as cool as you can, but some recipes have you popping everything in the fridge every five minutes, and that just isn’t necessary. Biscuits were perfected in the South, before air conditioning, so they can survive it if things aren’t perfectly cold.

4. Get the best buttermilk you can. It will definitely make a difference. But also, don’t be afraid to try yogurt, sour cream, or sour milk in a pinch, just as long as you have the best of those that you can.

Biscuits with butter and honey

biscuits with butter and honey